

You're wondering why the hell you should learn a framework while you feel you could code anything with JavaScript only? Or maybe you just want to see how the Vue.js syntax looks, and make your choice between Vue and React or Angular?
In this article, we'll develop the same app twice. The first time, we'll be using vanilla JavaScript and the second time we'll get into Vue.
This will allow us to clearly see the purpose of using a framework, as well as introducing you to the Vue.js syntax.
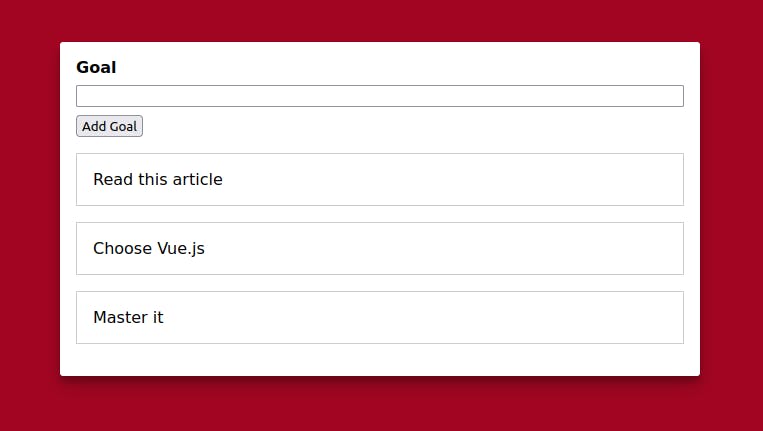
The project we'll build is a simple goal application with which you can only click a button to create a new goal and display it on the screen.
Here is how it looks:
Building the app with Vanilla JS
We'll pass quickly on the vanilla part, but here is what our HTML file looks like:
<!DOCTYPE html>
<html lang="en">
  <head>
    <meta charset="UTF-8" />
    <meta name="viewport" content="width=device-width, initial-scale=1.0" />
    <title>Goal Tracker in Vanilla JavaScript</title>
    <link rel="stylesheet" href="styles.css" />
  </head>
  <body>
    <div id="app">
      <div>
        <label for="goal"><strong>Goal</strong></label>
        <input type="text" id="goal" />
        <button>Add Goal</button>
      </div>
      <ul></ul>
    </div>
    <script src="app.js"></script>
  </body>
</html>
And here is our CSS simple styling file:
body {
  margin: 0;
  padding: 0;
  box-sizing: border-box;
  font-family: sans-serif;
  background-color: #a20521;
}

#app {
  margin: 3rem auto;
  max-width: 40rem;
  padding: 1rem;
  box-shadow: rgba(99, 99, 99, 0.2) 0px 2px 8px 0px;
  border-radius: 3px;
}

label,
input {
  margin-bottom: 0.5rem;
  display: block;
  width: 100%;
}

ul {
  list-style: none;
  margin: 1rem 0;
  padding: 0;
}

li {
  margin: 1rem 0;
  padding: 1rem;
  border: 1px solid #eee;
}
Now, more importantly, here is what the JS file looks like:
const buttonElement = document.querySelector("button");
const inputElement = document.querySelector("input");
const listElement = document.querySelector("ul");

function addGoal() {
  const enteredValue = inputElement.value;
  const listItemElement = document.createElement("li");
  listItemElement.textContent = enteredValue;
  listElement.appendChild(listItemElement);
  inputElement.value = "";
}

buttonElement.addEventListener("click", addGoal);
If you've practised Vanilla JavaScript for some time, this code may seem familiar to you.
In case it isn't, here is what it does:
- Gets access to the button element, the input element and the list element
- Creates an
addGoalfunction - Listens if a
clickevent happens on the button and triggers theaddGoal()function when it happens
And here is what the function does:
- Retrieves the entered value
- Creates a new
liHTML element - Sets the element to the entered value
- Appends the new
liitem to theulelement - And finally, clears the input so that the user can enter a new goal without having to delete the previous one themselves
As you can see, this is quite a bunch of tasks. The way the function is created especially is typical of what we call imperative programming.
Imperative means that you describe every step that has to be performed: first you retrieve the entered value, then you create a new list element, etc.
This is neither very intuitive nor very efficient. It actually took five steps just to add one line of HTML. Not that impressive, right?
Say goodbye to this with Vue.
Building the same app with Vue
The declarative approach
With Vue, we're going to have a very different approach.
Instead of describing every step that has to be done, we're going to define what we want (the end result) and the data we'll need. That's it. Then we'll leave to Vue all the different steps that has to occur in the DOM.
This approach, where you just give the data and the end result is called declarative programming, as opposed to the imperative approach where you describe every step relentlessly.
Let's create our first Vue app
We'll first need to create a new Vue app. That app needs to be mounted on the right element (using its CSS selector) with the following code:
Vue.createApp().mount('#app');
Then, we put inside a object that'll have two properties (data and methods). You cannot choose these properties' names.
Vue.createApp({
  data: /* our data */,
  methods: /* our methods */
}).mount('#app');
Next, we set our data using a function returning those data. In our case, we need an array that'll store all of our goals, and the value entered by the user:
Vue.createApp({
  data: function () {
    return {
      goals: [],
      enteredValue: ""
    };
  },
  methods: /* our methods */
}).mount('#app');
Then, we store our method into an object inside the methods property:
Vue.createApp({
  data: /* our data we just wrote */,
  methods: {
    addGoal: function() {
      /* our only function */
    }
  }
}).mount('#app');
This method called addGoal will look at the current object and push into the goals array what's inside the enteredValue property.
Vue.createApp({
  data: /* our data we just wrote */,
  methods: {
    addGoal: function() {
      this.goals.push(this.enteredValue);
      this.enteredValue = "";
    }
  }
}).mount('#app');
This property is the one of the current object, so we refer it as this.enteredValue.
Well, that's a bit quick actually, but the magic Vue does here is beyond the scope of this lecture. Just remember that we need the this keyword to refer to any piece of data we have in our data property.
And that's it for now!
Zooming out
Let's see what we just did here.
Vue.createApp({
  data: function () {
    return {
      goals: [],
      enteredValue: ""
    };
  },
  methods: {
    addGoal: function() {
      this.goals.push(this.enteredValue);
      this.enteredValue = "";
    }
  }
}).mount('#app');
This code does the following:
- It creates a new Vue app with an object as argument and mount it on the HTML element that has the
appid - The object takes a
dataproperty and amethodsproperty
These properties contain everything we'll need in our app:
- The
dataproperty contains a function that returns an array (our goals list) and a string (the new goal entered by the user) - The
methodsproperty contains an object with anaddGoalfunction which solely manipulate the data above (pushing the entered value into the goals array and empty the entered value)
Let's get back to the HTML
Now in order for this script to work, you have to change the HTML code a bit. This is what differs a lot from Vanilla JavaScript: you'll work in combination with the HTML file.
Here is how it looks:
  <body>
    <div id="app">
      <div>
        <label for="goal">Goal</label>
        <input type="text" id="goal" v-model="enteredValue" />
        <button v-on:click="addGoal">Add Goal</button>
      </div>
      <ul>
        <li v-for="goal in goals">{{ goal }}</li>
      </ul>
    </div>
    <script src="https://unpkg.com/vue@next"></script>
    <script src="app.js"></script>
  </body>
Here, the input element has a new attribute called v-model. This attribute is only understood by Vue.
It establishes a connection between the input and the data in our script, allowing us to retrieve the value entered by the user and store it as a piece of data in our script file.
Of course, it needs to have the same name value as in our property (enteredValue).
Remember how it's written:
Vue.createApp({
  data: function () {
    return {
      goals: [],
      enteredValue: ""
    };
  }
/* ... */
}).mount('#app');
Vue will automatically listen to what is entered by the user and update it accordingly. How great is that?
On the HTML button, v-on:click="addGoal" is equivalent to an event listener. It means that if a click event happens (you could write any event instead of click here), then the addGoal function has to be fired.
Again, remember what's inside our script file:
Vue.createApp({
/* ... */
  methods: {
    addGoal: function() {
      this.goals.push(this.enteredValue);
      this.enteredValue = "";
    }
  }
}).mount('#app');
Finally, we need to set a li element with the v-for attribute.
<li v-for="goal in goals">{{ goal }}</li>
There, goal in goals will act as in a classical for loop. It will loop through the goals array of our Vue code. Then, Vue will automatically generate a list element for every element in the array.
{{ goal }} indicates the place where each element has to be displayed.
Note that we need to import Vue in our HTML, and place it before our main script.
<script src="https://unpkg.com/vue@next"></script>
Recap
As you can see, we're working in close combination with both the HTML and the script file here.
Instead of manually reach out to the HTML elements and adding a click event listener, we've been able to do the exact same thing with a code that's much more readable.
Now, this was only a small example with a very simple application. Can you imagine how this could change your life as a developer in a slightly bigger project?
Don't make that mistake
I plan on publishing many similar articles on Hashnode in the future. If you liked this article, consider ✅ following this blog (back to the top right corner) so you don't miss any!
It really gives me superpowers and makes me want to write even more.
Also check out 🐦 my Twitter, where I write daily on web development and how to become a better learner.
Thank you to Maximilian Schwarzmüller whose course on Udemy inspired this article.